Tips and Tricks for Clipping your Horse.
- Dec 18, 2018
- 6 min read
Updated: Aug 7, 2025
Clipping your horse can make a wonderful overall appearance in just a short while. Almost all competitive and amateur riders clip their horses, whether it’s a simple trace clip or an all over, completely bald look. Lots of people get a professional groom in to do the deadly deed, but with a bit of help and guidance you can do it yourself with our helpful tips and tricks for clipping your horse.

Why Clip Your Horse?
There are several important benefits of clipping a horse, especially during the colder months or when your horse is in regular work. Removing excess winter coat can make a huge difference to their comfort, hygiene, and your day-to-day grooming routine.
Better Temperature Regulation
A thick winter coat may keep your horse warm at rest, but it can quickly lead to overheating during exercise. Clipping allows your horse to cool down more effectively, reducing the risk of chills or sweat-soaked rugs after work.
Quicker Drying After Workouts
A clipped coat dries faster, which is ideal for horses in consistent training or competition. No more waiting for hours with a sweat scraper and towels—just rug appropriately and you're good to go.
Easier Grooming
Muddy legs, sticky sweat marks, and tangled feathers are much easier to manage with less coat. Clipping simplifies your grooming routine and saves time, especially during wet, muddy months.
Improved Hygiene
For horses prone to skin conditions or irritations, clipping helps to keep the coat clean and breathable. It's especially helpful for managing mud fever, rain scald, or fungal infections.
Types of Horse Clips

The right clip depends on your horse’s workload, turnout routine, and management. Here’s a quick horse clipping guide to help you choose:
Full Clip: Removes all body hair (including legs and face). Ideal for horses in full work with no turnout.
Hunter Clip: Full body clipped except for legs and saddle patch. Suitable for horses in hard work.
Blanket Clip: Hair left on the back and hindquarters, clipped under the belly and neck. Great for moderate work and some turnout.
Trace Clip: Hair removed from the lower neck, chest, and belly only. Ideal for light work and regular turnout.
Bib Clip: Smallest clip—removes hair from just the front of the neck and chest. Perfect for horses in very light work.
Each clip type balances warmth and performance, so it’s important to choose based on your horse’s lifestyle.
Prepare the clipping area
Ideally choose an area that is undercover has good natural light and is near an electrical point if one is required. If you are using a main powered horse clipper, make sure you use a circuit breaker. This will help prevent a serious accident if the horse were to stand on the wire.
Pre-Clipping Preparation
If you know you want to clip your horse the next day, here are some horse grooming tips before clipping. It is advisable to wash and thoroughly dry the horse the day before to make sure the coat is clean and free from dirt and mud especially detangling the coat, around legs and feathers which will quickly clog and blunt your clipper blades. Use a shedding blade or curry comb to remove excess loose hair if the coat is particularly thick. Using a product like Equaderm, leaves oil in the coat, which helps your clipper run smoother, at the same time helps condition the horses skin.

Leave your horse in the stable overnight and an hour before clipping take their rug off to allow the coat to breath.
If you horse is known to be fidgety then it may be advisable to stand them with a hay net to help keep them occupied. If you don’t feel confident clipping by eye, draw lines on your horse with a piece of white chalk to ensure the lines are even and balanced on both sides. If you are considering a hunter clip, draw around the saddle and it will give you shape.
Preparing your clippers
Set up your clippers in advance and test that they run OK. Clipper blades should always be clean and sharp and not left to corrode from the previous clipping season. Check that the blades are correctly tensioned. Remember tensioning works better with less pressure than too much.
· Turn the tension nut clockwise until it feels tight and then loosen the tension nut back 2 ½ times.
· Try on the coat and if it is not cutting, turn a ¼ turn and then a further ¼ turn until the blades are cutting.
· If they are too tight they will wear out sooner and put pressure on your clipper motor.
Some clippers run on mains power, and others run from a handy battery pack.
Keeping Your Horse Calm During Clipping
Clipping can be a stressful experience for some horses, especially if they’re young, sensitive, or have had a bad experience in the past. A calm horse not only makes clipping easier, but it’s also much safer for both you and them.
Here are a few proven techniques to help keep your horse relaxed:
Use a Quiet Clipper
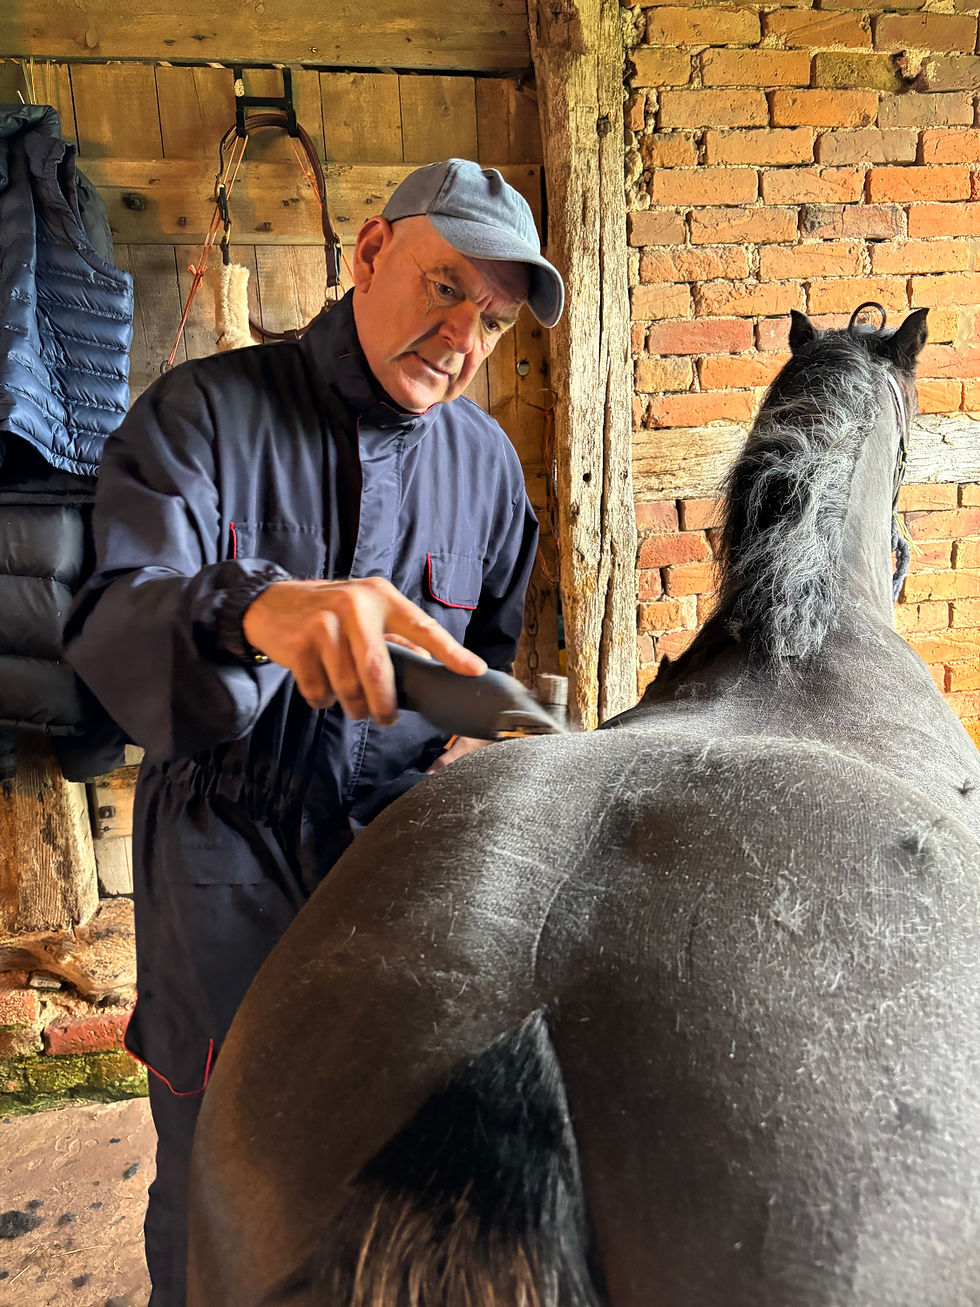
With any horse it is always best to run the clippers first so the horse gets use to the noise. Place them on the shoulder so they get accustomed to the noise and vibration.
Introduce Clippers Gradually
Clip the neck and shoulder first as it’s the less sensitive area. Use long smooth strokes against the lie of the hair growth, and overlap each stroke slightly to achieve a smooth finish.
When clipping between your horse’s legs and around the elbows it is always handy to have someone at hand to lift the leg so the skin is pulled tight. When clipping towards the horse’s mane push the mane to the other side to help prevent clipping into the mane hair and causing unsightly spikes.
Keep Sessions Short and Sweet
If your horse is new to clipping, keep the first session brief. Even clipping in stages over several days can help build their confidence.
Aftercare for a Clipped Horse
When you have finished clipping, give the horse a wipe down with a stable rubber wrung through with warm water to help remove the coat grease and sooth the skin. Stand back and look at what you have achieved. Should you have missed any stray hairs, this is when you should just run the clippers back over that area.
Help and advice with clipping your horse
If at any time while you are clipping your experience some problems with your equipment, always remember the following: My blades won’t cut
The tension might be too slack.
They may be blunt and need replacing with a sharp set.
My clippers won’t turn on
Check to see if the fuse has blown.
Check to see if the thermal cut out switch has popped out and needs resetting.
Check the mains cable for damage.
My machine is getting too hot
Check the blade tensioning, if they are too tight the blades will get hot and the heat will back up into the hand piece.
Check the air vents are free from hair.
My blades are getting very hot
Ensure your blades are properly oiled with Clipit Easi Oil. They should be oiled before, during and after clipping. You cannot over oil your blades!
Check the tensioning on the clipper.

Looking after your horse clipping blades and clippers
Horse clippers and grooming gear are expensive, so it’s important to look after them correctly. To clean and oil the blades you need to remove as much hair as possible with a good sturdy brush, such as a clipper brush. Use Clipit Ice Care Spray to sterilise, de-odorise and sanitise your equipment. Clipper blades should always be oiled with Clipit Easi Oil Spray, which is a micro-fine lubricant for easy use. It is quick to apply, providing fast lubrication to keep clipper blades cool and to help prevent rusting. The spray is designed to help lengthen the period between sharpening.
Conclusion
Clipping your horse is a skill that can be learnt quickly and by anyone. With helpful tips and tricks, you can make the experience a pleasant one for both you and your horse. Always remember to prepare the area, your equipment and the aftercare of both your horse and clippers.
You maybe interested in: